Monday, December 27, 2010

Pasta with Chévre, Sun Dried Tomatoes and Walnuts

Years ago, we spent a couple of months in a farmhouse south of Florence. Every week or two we'd catch the bus to Florence and take in some culture – the Uffizi, the Duomo, perhaps a Medici palace; then we'd head for a little lunch bar which was nothing more than a counter overlooking the street selling warm rolls and red wine. The rolls were stuffed with braesola, rocket and olives; or the unctuously salty porchetta; or any other of thirty-odd fillings. One day, I ordered goats cheese and sun dried tomato, and the dark smoky flavour of the tomato melded so perfectly with the cheese that it became my staple.

We'd stand around on the cobblestones chewing, chatting and window shopping next door as we had our quick bite; wine finished, we'd slip our empty glasses into the wooden pigeonholes mounted on the wall next to the counter and wander off. It may not have been the fanciest lunch, but it was simple food done well, and it hit the spot every time.

Now I'm a million miles from Florence and no longer drinking wine for lunch. As Christmas loomed and we ran around like headless chooks, I relied heavily on quick store cupboard meals: pasta with canned tomatoes; tortillas with canned pulses; rice and canned beans; tuna pasta – in other words, a heap of tins from Italy and nothing very local at all. I found myself wondering how to make a quick meal from local food, that is, a meal in minutes that required no peeling and almost no cooking.

One evening, as I heated water for pasta, I thought about the half block of chévre in the fridge. I remembered with satisfaction the Florentine sandwich; and I also recalled a favourite little nibble in Maggie's Harvest, in which vine leaves are stuffed with goats cheese and walnuts. Being the sort of person who always has sun dried tomatoes and walnuts handy, I put them together with the chévre, added a little thyme from the garden, tossed it all through some pasta, and hey presto! dinner.

The heat of the pasta softened the chévre, while the sun dried tomatoes and thyme provided small explosions of flavour, countering the mildness of the cheese. Walnuts gave it a bit of crunch, and the earthy scent of walnut oil wafted up with every bite.

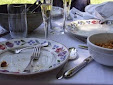
The whole thing was an absolute doddle to make. On the side I served lettuce drizzled with walnut oil and a splash of vinegar, and came away feeling like I'd eaten well without having had to cook. Simple food, done well: whether in Florence or in Melbourne, it will always hit the spot.

A note on walnuts: Pre-shelled walnuts in a plastic bag imported from overseas are almost always rancid: bitter on the tongue, and smelling like glue. Use only freshly cracked walnuts or this year's vacuum packed Victorian walnuts. They will be sweet, nutty and delicious with not a hint of sourness. To shell a walnut, use a hammer: hold the nut, pointy side down, on a brick or the back step, tap once or twice with the hammer, and the shell will fall away.

Pasta with Chévre, Sun Dried Tomatoes and Walnuts

- 75g chévre
- 5 sun dried tomatoes
- 10 to 12 freshly shelled walnuts
- walnut oil
- a sprig of fresh thyme, (optional)
- pasta for two

Heat water for the pasta. When it comes to the boil, salt and drop in the pasta. Stir, bring back to the boil, and cook until al dente.

Meanwhile, wash the thyme and spin dry. Pick the thyme leaves from the stems and leave whole. Chop the sun dried tomatoes into small pieces. Break the walnut meats into pieces.

When the pasta is cooked, drain and tip into a serving bowl. Sprinkle in the thyme leaves; add the sun dried tomatoes and walnuts. Crumble the chévre over the pasta. Drizzle with walnut oil (I put a nozzle on the bottle which keeps it to a very thin stream; a glug would be unpleasantly overpowering), and mix well to combine. Serve at once. Pass the parmesan, if you wish.

(Local: pasta, chévre, walnuts, walnut oil, thyme. Not local: sun dried tomatoes.)

Sunday, December 19, 2010

Orange and Saffron Scented Vegetables

So much of vegetarian cooking is about seeing an interesting meat dish, then working out if it could be done otherwise. But every now and then I have a vegetarian recipe, and I find myself thinking about adding a little flesh.

Deborah Madison provides a delicious recipe for what she cheerfully describes as a 'failed fisherman's soup'. Her recipe was inspired by a bouillabaisse which did, indeed, contain fish. And while her version is wonderful, a few mussels make it perfect.

Mussels or not, the bouillabaisse is accompanied by a garlicky mayonnaise. Madison suggests making rouille, that is, spicy garlic mayonnaise flecked with cayenne. However, the little people in my household don't like hot flavours, so I made plain old aioli – garlic mayonnaise – instead.

Orange and Saffron Scented Vegetables aka Not Bouillabaisse

- 1 kg potatoes
- 1 leek, chopped finely
- 1 onion, cut into wedges ½ inch thick
- 2 cloves garlic
- 3 pinches saffron threads
- the zest of half an orange, finely chopped
- 2 bay leaves
- 1 cup white wine
- 1 large or 2 small bulbs fennel, halved lengthwise, then sliced into wedges joined at the root
- a handful of white mushrooms, quartered
- 1 can chopped tomatoes
- 10 stems flat-leaf parsley, chopped
- 1-2 tbs fennel tops, finely chopped
- 15 black olives, pitted
- olive oil

Boil the kettle. While it is heating, peel the potatoes and halve them lengthwise. Slice the lengths into quarters or sixths, depending on their size. Pour the water into a pot, add the potatoes, and boil for five minutes. Drain.

Warm some olive oil in a wide skillet. Add the leek and the onion, along with a dash of salt. Sauté for a few minutes, then add the garlic, saffron, orange zest and bay leaves. Cook for a few minutes more, pushing it around with a wooden spoon to ensure the garlic doesn't catch and burn. When the leek and onion are beginning to soften, add the wine. Bring to a simmer, and let it reduce slightly.

Add the potatoes, the fennel, the mushrooms, the can of chopped tomatoes, half the parsley and the olives. Cover, reduce heat, and leave to stew for half an hour or until you can slip the point of a knife into the base of the fennel. Stir in the rest of the parsley and the fennel tops.

Remove from the heat, and serve with a bowl of aioli on the side. Best eaten tepid rather than hot.

Note: Near the end, you can throw in half a kilo of cleaned mussels. Clap on the lid, raise the heat, and let them steam for five minutes. Remove the lid, and, if many mussels remain closed, push them around with your spoon, replace the lid, and steam for another three minutes. Check again, and discard any that are still closed. Strew the parsley and fennel tops over the dish, and serve immediately. The mussels will have released a briny liquid into the stew, so go easy on the salt.

Tweaked from a recipe by Deborah Madison in The Savory Way.

(Local: potatoes, leek, onion, garlic, orange, bay leaf, wine, fennel, mushrooms, parsley, mussels if used. Not local: saffron, tomatoes (unless you canned your own last summer), olives, salt.)

Lazy Aioli

It's lovely to be married. The ties may bind, but they have a liberating effect: I have freedom to relax, to be myself, and to eat raw garlic.

One way we like to eat it, smelly old us, is in aioli. Last night we dropped great dollops into a vegetable stew, and swirled it through the potatoes, the fennel, and the sauce fragrant with saffron and orange. At the bottom of the dish, tomato and aioli surged together. I mopped them up with a bit of bread, and sighed with delight.

This morning I have the soft taste of garlic at the back of my throat and my skin is slightly fragrant. It makes me feel warmer, more sensual, less harried, less Protestant. And in the approaching madness of the holiday season, that, my friends, is wonderful.

Lazy Aioli

- 4 to 6 cloves garlic
- a generous pinch of coarse salt
- 1 egg
- ½ or so cup olive oil
- the juice of a lemon juice

Whack the garlic cloves with the flat of a knife and flick away the skins. Drop the cloves into a mortar along with a generous pinch of coarse salt. Grind the garlic and salt together until it has formed a paste.

Scrape the paste into the small bowl of a food processor. Add an egg, and whizz until well combined. Gradually add the olive oil, initially a little at a time and then in a thin stream, processing very thoroughly all the while. When the mixture is pale and thick, add the lemon juice, and whizz again. Taste, and add a little more olive oil or lemon juice if required, whizzing once more to amalgamate the ingredients.

Traditionally, aioli was made by hand. To do so, pound the garlic and salt together, then proceed using a whisk. Use only the yolk of the egg, and add the olive oil in tiny, tiny increments to ensure emulsification.

Serve aioli with potato wedges or grilled vegetables; stirred into white beans; dropped into soup; or drizzled liberally over a vegetable casserole.

(Local: garlic, egg, olive oil, lemon. Not local: salt.)

Tuesday, December 14, 2010

Horta, or Cooked Green Salad


Horta

Three kids. One at school, one at kinder, one at childcare. I've come to think of their educational experience as three breeding grounds, since for months now we've been continually sick with colds, gastro, strep throat and other minor but annoying illnesses. As a result, I'm on the lookout for food that is simple to cook and bursting with vitamins; and a few weeks back, in the newspaper's gardening page, I stumbled across horta.

I learned that horta is Greek for wild greens. While horta may be used in pies and salads, the word most usually refers to greens stewed and served with olive oil and lemon juice. A flick round the internet suggests that many people primarily use spinach, but it was traditionally made with whatever was available: beet leaves, dandelion, chicory, sorrel, radicchio, rocket, endive and other greens both wild and cultivated. The gardeners in the article make horta out of amaranth, wild thistles and stinging nettles.

The concept is simple – just stew and dress the greens – but, while I already did this with beet leaves and rainbow chard, it never quite occurred to me to broaden the net. Now I've made horta using spinach, dandelion and warrigal greens, and I love it. Mature dandelion leaves are quite bitter, but young inner leaves stewed with beet leaves make a tasty lunch.

On one occasion I used coarser greens: a few leaves of black kale combined with rainbow chard and large turnip tops. Because the turnip leaves were very bitter I added a slosh of red wine from the open bottle on the bench and stewed it until the wine had been completely absorbed and all was tender. The final mix was still strong, but the wine had softened the flavours very pleasingly.

Taking my inspiration from the gardeners in the article, I've eaten horta alongside bread and olives, using the bread to soak up the juices at the bottom of the bowl; other times, I've made it more substantial with a bowl of cooked and dressed chickpeas on the side, or a couple of poached eggs.

Not only does it taste good; each bowl feels like a vitamin pill. Sad to say, for all the horta I've eaten I'm still pouring snot – but it could be worse! In any case, I feel healthier every time I eat it. What follows is not a precise recipe, nor do I claim authenticity; think of it, like the gardening article, as nothing more than a pointer in the right direction. A-tishoo!

Horta, or Cooked Green Salad
- greens (spinach, beet leaves, warrigal greens*, turnip tops, radish tops, stinging nettles, amaranth, sorrel, dandelion leaves, fat hen or whatever else grows in your garden. Use one type or a combination – experiment!**)
- herbs such as mint and parsley, if you wish, chopped
- olive oil
- lemon juice
- salt, pepper

Wash the greens well and remove any tough stalks. Warm a wide skillet, add a drizzle of olive oil, and drop the greens, water still clinging to the leaves, into the skillet. Cover, and allow to wilt. Spinach will take a few minutes; large beet leaves, ten minutes; tough kale, about half an hour. Keep an eye on things, and add extra water if necessary to prevent the horta from drying out and sticking. (For a completely inauthentic approach, add a slosh of red wine to coarse bitter greens to soften the flavours.)

When the greens are soft, tip them and any remaining cooking liquid into a bowl. Add chopped herbs, if you're using them, a squeeze of lemon juice, and a drizzle of extra virgin olive oil to finish. Season if required. Serve with olives and sourdough for a light meal; or serve as a side dish to a larger meal.

*Warrigal greens (aka New Zealand spinach and tetragon) MUST BE BLANCHED before use. Drop them into a pot of boiling water, cook for a minute with the lid off, then drain well before adding to the horta. The leaves contain high levels of oxalates which can cause a tightening of the throat, nausea and worse when consumed in large quantities. Blanching breaks down the soluble oxalates and also some of the salts; leaving the lid off the saucepan prevents condensation from falling back into the saucepan. Discard the blanching liquid.

**If you're experimenting with combinations of leaves, think about flavours, textures and cooking times. For example, mustard greens will obliterate most other flavours, so are best kept separate. Kale will need far longer in the pot than soft baby spinach – either combine leaves of similar textures only, or cook the greens in stages, beginning with coarser leaves and adding more delicate greens near the end.

One final note: To point out the obvious, if you don't know it's edible, don't eat it. And if you're gleaning horta from a public space, be certain that the area hasn't been sprayed and wash it well. There are many dogs in Melbourne.

The recent Age article (by Denise Gadd, in the A2 on 27 November 2010) doesn't appear to be online, but you can read more about horta in Melbourne here. This all reminds me of an interview on Gardening Australia with Lolo Houbein, author of One Magic Square, about her experience as a famine survivor, organic vegetable gardener and voracious eater of leafy greens. The presenter asked her what happened if the leaves were attacked by insects. Lolo said, 'Then you get holes. And you can eat holes.' Terrific advice for a home gardener! Sadly the transcript doesn't do justice to her delightful gentle manner.

(Local: greens, herbs, olive oil, lemon juice.)

Wednesday, December 1, 2010

Braised Turnips and Pasta


Once upon a time not so very long ago lived dreamy gardener. From time to time, she'd cast seeds upon the earth and sprinkle them with water; then she'd be distracted by the clouds drifting across the sky, or the sound of the wind whispering secrets to the sheoak, and forget about them.

One day, while wandering in the garden, the woman brushed against a forgotten turnip.

Left to itself in a quiet spot, it had grown and grown until the leaves were as high as her waist. Quivering with expectation, the woman felt around the base and discovered a root the size of a softball. She wrapped her hands around the stem, and heaved, and pulled, and as she thought of the little old man, the little old woman, the boy next door, the girl next door, the dog, the cat, the rat and the mouse, out it came.

Cackling, she carried it inside and placed it on the scales. The turnip weighed a kilo, the leaves another. She rubbed her hands together with glee, and started to cook.

When everything was ready, she called her husband and their three little girls to the table; and between the five of them, they ate it all up.

***

Turnip greens can be rather unattractive: a little bumpy, a little chewed, a little rough and hairy. Raw, they are bitter, and the hairs can irritate the skin. But blanched and stewed in butter, mellowed by sherry, tossed through pasta and gussied up with Parmesan, they become soothing and delicious, retaining their strength of character but becoming a little gentler, a little wiser, a little more generous, just as we ourselves might hope someday to become.

Braised Turnips and Pasta

- 3 bunches of baby turnips, or 6 normal sized turnips, or 1 gigantic turnip, with spritely greens attached (You absolutely do not need a kilo of turnip greens – although they are rather yummy – just as many as you can glean from the bunch.)
- 50g butter
- 1 tbs olive oil
- 2 cloves garlic, whacked with the side of a knife so that they are split
- 1 tbs sugar
- ½ cup sherry
- ¼ cup water (you can substitute stock for the wine and water combo)
- salt
- enough pasta, say 375g to 500g depending on your household and whether you use wholemeal or white. Spaghetti is good here; the leaves enfold themselves around the strands and you can stab a piece of turnip onto the end of your bundle of pasta.
- freshly grated parmesan

Trim the turnips. Wash the leaves well and discard any that are yellowing. Trim the thickest part of the stem from the leaf and discard.

If you are using baby turnips, scrub them. If you are using larger turnips, peel them, halve them, chop them into wedges then halve the wedges crosswise so you have a pile of turnip chunks.

Warm the butter and oil in a wide skillet. Add the garlic and the turnips and stir. Sprinkle with sugar and stir again. Cook over medium heat until they turn golden, pushing them around with a wooden spoon from time to time to ensure they cook evenly and do not stick. This will take about twenty minutes.

Add the sherry and water (or the stock) and stir well, scraping up any bits of glaze off the bottom of the pan. Bring the liquid to a simmer, cover, and cook for 10 to 15 minutes more, or until a knife slips easily into the turnips.

While they are cooking, bring a large pot of water to the boil. Salt it, and drop in the turnip leaves. Scoop them out with a slotted spoon, and gently press them in a colander to drain. Chop the leaves roughly and add them to the turnip.

Bring the water back to the boil and add the pasta. Near the end of the cooking time, check that there is still some liquid in the turnip pan. If not, add about ¼ cup of the pasta cooking water so that you have enough sauce.

When the pasta is al dente, drain it and add it to the turnips. Gently mix the pasta and turnips together for a minute or two to combine, then serve.

Don't forget to pass the parmesan!

Developed from a recipe for braised and glazed turnips found in The Cook's Companion by Stephanie Alexander.

(Local: turnips, olive oil, garlic, pasta. Not local: butter, sugar, salt, sherry, parmesan.)

Monday, November 29, 2010

Nice Salad, Flowers Optional


In her marvellous book The Savory Way, Deborah Madison includes broad suggestions for 'Celebration Salad with Blossom Confetti'. As the mother of three girls, all of whom adore bright colours and flowers, I have used this idea countless times to make them eat. My experience is that a girl who turns up her nose at a perfect green salad, delicately dressed, cannot resist the same green salad when it's scattered with ribbons of flower confetti. The girl who screams every time she sees a potato will quietly eat if it's garnished with a few bright strips of nasturtiums.

If the nasturtiums aren't flowering, I might use whole borage flowers – the tiny blue stars taste ever so faintly of cucumber – or perhaps rocket flowers for a bit of zing. Violets are beautiful; red pineapple sage adds a slightly tropical fragrance; tiny marjoram, basil and thyme flowers each have their own flavour and are delightful to look at. You can eat most if not all herb flowers, as well as calendulas and rose petals. Cut larger petals into strips, so they do not catch on one's tongue; and use a sharp pair of scissors or a good knife to slice them cleanly. Eat smaller flowers whole.

As well as paying attention to petals, I look for interesting leaves. Soft green mignonette, freckled lettuces, red oak leaf: all make a pretty salad base, especially if they are complemented by tiny little rainbow chard or beet leaves. Use chard or beet leaves no longer than two inches in length, before they become tough.

On a hot night last week, we ate salad for dinner. I used to shop to make a classic salade niçoise; but one day it occurred to me to use whatever fresh ingredients I had in the garden. Now my salad changes month in month out. Later in the summer I will use the more traditional generous handful of green beans instead of cucumber, blanched for a minute or two; and yellow and red cherry tomatoes off our vines.

The quantity of tuna makes it filling enough for our family of five – three of whom are quite little – to consider it dinner, especially if it's accompanied by a thick piece of sourdough brushed with olive oil and char grilled. If your household is smaller, use less tuna and fewer eggs.

We call this Nice Salad, because some days it's salade niçoise and other days, it's just nice. Flowers are, of course, optional.

Nice Salad

- a fancy lettuce
- a handful of tiny beet leaves and/or rainbow chard leaves, if you have them
- 8 to 10 new potatoes (those tiny little golf balls, fewer if your potatoes are large)
- 2 to 6 eggs (depending how hungry everyone is and how many people there are)
- a cucumber, preferably a sweet Lebanese cucumber, but an English one will do
- 425g tin tuna (packed in oil because it tastes approximately a thousand times better)
- 2 or 3 tomatoes
- a dozen black olives and in this house this means Kalamata (optional)
- 5 or 6 nasturtium flowers, as bright and fresh as possible (optional)
- a lemon (or some wine vinegar or even tarragon vinegar if you have it)
- olive oil, salt, pepper

Bring a pot of water to the boil, and cook the potatoes until they are done. Add the eggs for the last six minutes. Drain, and halve the potatoes. Place the eggs in a bowl of cold water, then peel and quarter them.*

Separate, wash and spin the salad leaves. Arrange on a large platter. Tumble the potatoes over the lettuce.

If your cucumber is English, peel it, halve it, slice out the seeds, cut each half into three or four lengths and chop them into pieces. If your cucumber is Lebanese, halve it lengthwise, quarter it lengthwise, and chop it into pieces. Scatter over the lettuce.

Cut the tomatoes into sixths or so – you want manageable wedges – and add them to the salad. Flake the tuna out of the can and onto the salad. Arrange the eggs over the top.

Press on the olives with the base of a heavy glass and remove the pip. Tear each olive into four or so pieces, and tuck them in.

Drizzle the lot with olive oil and a generous squeeze of lemon juice or a splash of tarragon or other light vinegar. Season if you wish, although I find the tuna and olives are enough seasoning for me.

Shake your nasturtium flowers to dislodge any ants. Snip the petals from all but one of the flowers. Holding the petals over the salad, snip them into pretty ribbons which will float down onto the salad. Place the last flower artfully in the centre, and serve.

*If, like us, your eggs are from the backyard and too fresh to peel without losing great chunks, poach them instead and gently lay the poached eggs on top of the salad – and throw in another couple of eggs because people will eat more when they're so delicious. A nice problem to have!

The idea of eating flower blossoms came from The Savory Way, an indispensable book for anyone learning to cook good food. Madison has a deep appreciation for vegetables, herbs, oils, vinegars and other flavours, and uses them to create wonderful dishes which are intelligent and delicious. She writes thoughtfully about ingredients, and in careful detail about technique. This book was my training ground – I worked my way from cover to cover, and have drawn from it ever since.

The photograph shows a version of this salad as requested and assembled by my four year old: lettuce, tomatoes, potatoes, green beans, cucumber, tuna, and nasturtium and borage flowers.

(Local: salad leaves, potatoes, eggs, cucumber, tomatoes, nasturtium flowers, olive oil, lemon. Not local: tuna, olives.)

Friday, November 19, 2010

Tuna Hash and a Poached Egg

There are some things I just cannot do. Touch my toes, speak French, or make potato pancakes. When I make potato pancakes, they rarely form a nice cake at the bottom; or if they do, they collapse when I come to turn them. But in my defeat I've decided that I'm good at hash: chunky, messy, and crisply golden.

Another thing I'm not so good at is gardening. I like the idea; I keep giving it a shot. But then we get sick or busy, the weeds take over, and I lose hope. A few months ago I gave up on the potatoes, sure that they wouldn't amount to anything much. But this week, after I pulled out the broad beans – which this person of little faith planted on top of the tatie trench – I began digging out some intrusive couch grass. As I dug, to my surprise I discovered taties the size of my fist – sixty of them!

Unfortunately, because I didn't expect them, by the time they were discovered I had impaled a dozen of them on the gardening fork, further proof I'm a rotten gardener.

With a sack of stabbed potatoes, a carton of backyard eggs, and three hungry kids, I found myself dreaming of hash. In an American diner, they're usually cooked with beef or pork and topped with a fried egg. However, we don't cook red meat and I don't like fried eggs.

But in a funny little second hand cookbook, I found another idea. The book is the hilarious Take a Tin of Tuna (yes, it's slightly nauseating if you look at it too long), and includes a recipe for tuna hash. While it wasn't exactly what I was looking for, by the time I had fiddled with the proportions and changed a few ingredients, I ended up with something truly satisfying. The tuna met my need for something unctuous and meaty mixed in with the potatoes, and was even enough to get my four year old, who mostly hates taties, to eat a plateful.

Of course, if you're concerned about the overfishing of tuna and your four year old will eat another form of protein, you might make it not with tuna but with a few thick slices of bacon, chopped and fried with the onions. Or leave out the meat and stud it with salty feta or grilled haloumi just before serving.

Tuna Hash and a Poached Egg

- 1 kg potatoes
- several tablespoons olive oil
- 2 or 3 shallots, or 1 onion, sliced finely into half moons
- 3 spring onions, finely sliced including some green bits
- 1 cup peas
- 425g can tuna (or 2 thick rashers of bacon or a slab of haloumi or perhaps some feta...)
- 3 or so stalks flat-leaf parsley (optional), chopped
- 6 eggs, or however many your household needs

Peel the potatoes (or not) and cut into rough 1cm dice. Bring a pot of water to the boil. Blanch the peas for a minute, then scoop them out with a slotted spoon. Set aside. Add the potatoes to the boiling water, and boil for 5 to 7 minutes, or until barely cooked. Drain and set aside.

Warm several tablespoons of olive oil in a large heavy skillet. Add the shallots (or the onion), and cook over medium heat until tender. Add the spring onions, potatoes, peas and tuna and stir to combine. Cook for 5 to 10 minutes, pressing down with a spatula from time to time to encourage golden bits.

While it's cooking, boil the kettle, pour the water into another wide skillet and bring to a very gentle simmer, that is, water in which a tiny bubble rises once or twice a second.

Run the spatula around the potatoes, turning them over and roughing them up. Cook for another 5 to 10 minutes, or until you have lots of golden crispy bits or you're just too hungry to wait any longer.

Meanwhile, poach your eggs* in the other skillet. To do this, break an egg into a shallow coffee cup. Gently slide it into the barely simmering water, and repeat until you have a ring of eggs. Poach for four to six minutes, or until the white is set but the yolk is deliciously runny. The time will depend on the size of your eggs.

Place a good helping of hash on each plate, and top with poached eggs. Sprinkle with chopped parsley and pass the pepper.

*Note: This method of poaching works perfectly with very fresh backyard eggs; pretty well with fresh organic eggs; but it's somewhat messy with stale supermarket eggs. You could always soft boil them instead.

Inspired by a recipe in Joie Warner's Take a Tin of Tuna.

(Backyard: potatoes, eggs, parsley. Local: olive oil, shallots, spring onions, peas, and possibly bacon. Not very eco or local: tuna.)

Tuesday, November 16, 2010

Christmas Cake

My grandmother made Christmas cakes every year. She would mail one to us across the Nullarbor, or persuade a travelling relative to squeeze it into their suitcase. I loved the thought but, I must admit, not the cake. It was always a little dry; and I could never get enthusiastic about glacé cherries or mixed peel – but I'd eat it for my grandmother.

My mother had her own recipe, a hearty thing full of raisins, decorated with glacé cherries and brazil nuts, and glazed with apricot jam. It was pretty good, but even it lacked a certain something.

For the first ten years that I lived out of home, it didn't occur to me to make my own cake; yet my Christmases felt strangely bereft. Meanwhile my sister had an annual date to make fruit cake with a friend, and each year I'd taste the latest recipe: one year, a fruity cake made with pineapple; another year, something lighter. They were lovely enough, but a few years ago I realised that, with girls of my own, I wanted a recipe that I can make year after year and which will one day taste like home.

In homage, I tried my grandmother's recipe, and my mother's, but I wasn't entirely happy with either of them. So then I read and fiddled around until I found a cake that I like. It's based on Nigella's recipe in her fabulous book, Feast. Her cake is more moist than the cakes of my forebears, and more delicately fragrant.

As good as it is, I have altered it to suit my taste. Unlike Nigella's, our cake is studded with ruby red cranberries and, thanks to the addition of quince marmalade, it has the faintest aroma of quince. I've upped the orange zest, and once the cake is made I drizzle it with Cointreau to keep it moist.

Made in November, the cake cures for at least a month in the linen cupboard. I bring it out in late December, and enjoy a small slice in the afternoon with a piece of hard cheese, or a sliver late at night with a soothing cup of Rooibos.

As part of developing our own tradition, I've involved my girls in the making of the cake. This year's attempt was like a Buster Keaton scene. My six year old was in a grump; my two year old threw plastic measuring spoons into the mixture and fell sideways off her stool; and my four year old wandered in picking her nose, then plunged her hand into the mix.

Why, I cannot tell, but after the initial screaming I philosophically resolved that as the cake was going to bake for four hours, it made no difference. In any case, it's a good story, the very stuff of family tradition – and it has another advantage. I absolutely adore this cake, scented as it is with cranberries, orange and quince; and with the intrusion of my daughter's grubby finger perhaps this year I'll get it all to myself. Or will you want a slice?

Christmas Cake
(26 cm tin)

- 1 kg sultanas
- 375g raisins
- 175g currants
- 250g dried cranberries (good ones from the organic shop, not those nasty craisins)
- 180ml sherry
- 350g butter, slightly softened
- 300g brown sugar
- 4 tsp orange zest (zest of 2 oranges)
- 6 large eggs
- 4 tbs quince marmalade
- 525g plain flour
- 1 ½ tsp mixed spice
- ¼ tsp cinnamon
- ¼ tsp salt
- 2 tbs Cointreau or other liqueur

Combine the fruit and the sherry in a large bowl and leave it to soak overnight. (I use an enormous ancient bowl that was my mother's; you may need to dash out and buy a large plastic tub.)

Preheat the oven to 150°C, and position a rack at the lowest rung. Wrap the tin in a double layer of brown paper extending to 10cm above the rim of the tin; you will need a child or friend to hold it steady while you tie it on. Line the tin with baking paper, also extending 10cm above the rim. This will prevent the top of the cake from catching or drying out during the long baking.

Cream the butter and sugar with the orange zest, then add the eggs one at a time, beating well between each egg. Add the quince marmalade and mix well. Fold in the dry ingredients, then gently stir the mixture into the fruit, scraping up fruit from the bottom until well combined. Use a very stout wooden spoon; a plastic spatula will snap.

Scoop the mixture into the tin, gently smoothing it to the edges. The batter will be very stiff.

Place into the oven and cook for an hour; then lower the heat to 140°C and cook for another three hours or until a tester comes out clean.

When it is done, brush the surface with two tablespoons of Cointreau or the liqueur of your choice. Wrap the entire cake, tin and all, with foil and leave to cool. When it is completely cold, remove the wrappings and the tin, and rewrap in foil. Place in a cake tin, if you have one big enough, and leave it to cure somewhere cool and quiet for a month or so.

Note: For an 18cm tin, use approximately one-third of the ingredients and cook at 150°C for 2 hours; for a 23cm tin, use two-thirds and cook at 150°C for 3 hours. For exact measures, or for a slightly different cake using other aromatics, see Feast.

(Local: sultanas, currants, orange zest, eggs, quince. Not local: raisins, cranberries, sherry, butter, sugar, flour, spices, salt.)

Thursday, November 11, 2010

Salsa Agresto

Every now and then, I experience a minor miracle: a food that my three children all like. Currently there are ten things on the list, and it is, indeed, a literal list, a dog-eared square of yellow card on our fridge naming the dinners my children have agreed to eat without fussing.

For the record, they are green pie, green tart, rice and lentils, pasta puttanesca (no chilli), pasta with olive and parsley sauce, pasta with tuna and peas, fried rice, tortillas with beans and guacamole, and couscous with chickpeas, cranberries and pine nuts. They will also eat homemade pizza they have topped themselves with olives and capers. It's not a very local list, and I struggle to find local foods that all three enjoy.

But this week, the miracle: salsa agresto! Salsa agresto is a sauce made from nuts, parsley and verjuice. It's principally used on meats and poultry, but I pretended it was a pasta sauce, tossed it through noodles and sprinkled it with parmesan. Boy, was it good.

It reminded me of a favourite salad I used to eat at a restaurant in DC made with fresh greens, and topped with homemade falafel balls, fresh grapes and toasted almonds. This was like eating the best bits of the salad in every mouthful.

At the base of the sauce lies verjuice*, which contributes a clear fruity flavour. Ordinarily I'd substitute something else; unlike lemons, verjuice doesn't grow on my neighbour's tree. However, the verjuice is what makes it. Its sweetness rounds out the flavours beautifully; straight lemon juice or vinegar would be too sharp. In any case, the word 'agresto' refers to grape juice, so without verjuice Salsa Agresto would have to be called something else.

The almonds were from our tree; the walnuts, local. If you are going to make this sauce, ensure you too are using fresh local almonds and walnuts. They're easy to find in the organic shops. Most imported nuts are rancid and will make your sauce sour and deeply unpleasant.

I based my sauce on a recipe in Maggie's Harvest. Maggie uses a combination of parsley and basil, but in my garden we don't see any basil until the parsley has well and truly gone to seed. In any case, I think the flavours of parsley, walnuts and almonds are quite enough, so I left the basil out.

Once the sauce was made, I reserved what we needed for one meal. The rest I placed in a very clean jar, covered it with a blanket of olive oil, and popped in the fridge. It should keep there for at least a week. We ate it with pasta; it would also go well with poultry, falafel or roasted root vegetables.

*Note: Verjuice contains sulphites; I realised this when I wandered around grumpily tight-chested for a couple of hours after the meal, then finally thought to check the bottle. If you, like me, are mildly sensitive to sulphites, consider warming the verjuice then simmering it uncovered for a few minutes. The heat will break down the sulphites into sulphur dioxide, which will evaporate (this is why you need to leave the lid of the saucepan off). Allow it to cool, then proceed with the recipe.

Of course, if you are highly sensitive to sulphites, cook something else; or try substituting half water, half lemon juice with a pinch of sugar, and adjust to taste; or even press your own grape juice from unripe grapes, which, in fact, is what I intend to do later this year as some of our grapes make a lovely juice, and the very thought of that delicate flavour as the base of this nutty sauce makes my mouth water even now.

Salsa Agresto

- ½ cup freshly shelled walnuts
- ½ cup freshly shelled almonds
- 1½ packed cups flat-leaf parsley
- 1 clove garlic
- ½ tsp salt
- ½ cup verjuice
- about ½ cup olive oil

Preheat the oven to 200°C. Roast the almonds and walnuts on a baking tray for 5 to 7 minutes, stirring from time to time. Remove from the oven when they smell lightly toasted. Rub any loose skins off the walnuts with a tea towel, and leave to cool.

Place the parsley, garlic, salt and nuts in a food processor and whizz. Slowly add the verjuice, then enough olive oil to loosen it up. Check for seasoning, and serve.

Adapted from a recipe in Maggie's Harvest by Maggie Beer.

(Local: walnuts, almonds, garlic, parsley, olive oil. Not too far away: verjuice. Not local: salt.)

Tuesday, November 9, 2010

Chicken with Marjoram


I am a sick woman. At least, that's what my husband says, because every time I see a cow I get hungry. A beautiful beast with soft eyes is gazing limpidly at me from a field, chewing the cud. My husband is ruminating on the idyllic pastoral scene, and I'm wondering aloud where I can find a good steak.

Other people understand. I met one such gentleman at Northcote Lake. He was feeding stale organic sourdough to the ducks (this is the inner north, after all), and we had a delightful time debating the merits of Duck a l'Orange, Peking Duck and duck with sour cherry sauce.

The lake at Malmsbury makes me hungry, too. It is populated by a flock of geese, and each time I see them my mind is flooded with an image of a perfectly golden roast goose surrounded by baked apples; my mouth fills with saliva. The day one goosed me, I was particularly tempted.

And now we have chickens. They are beautiful birds; they make me laugh; they have distinct personalities; I like to stroke them... and they are so plump.

I'm like some ravening beast from a cartoon show. Yet I have almost never cooked meat, testament to a long-standing commitment to consume less. I do eat meat when we're out and about, which is rare these days; but I don't cook it at home. We stick to eggs, pulses and fish.

But when we're not eating eggs, I've been wondering about the sustainability of this commitment. Sure, I soak Australian pulses, but when I'm in a rush, which is often, I reach for the cans from Italy. Yet buying canned vegetables from Europe feels environmentally insane – the food miles! – and ethically dubious. Those Albanian field workers aren't treated too well.

On the other hand, the more I read about overfishing and the working conditions of many fishing crews, the less keen I am on fish. Half the time I can't find anything from the sustainable fishing guide at the fish shop; and in any case my kids don't really like fish, except mackerel (unavailable in Australia), salmon (which is usually farmed, pumped full of antibiotics and fed ground up by-catch) and canned tuna (and the sustainable ones give them a rash. What is that about?).

I'm starting to think that eating local chicken might be better.

So last week, in a radical move for our household, I made my first tentative foray into cooking poultry. I bought some local free range drumsticks and roasted them with marjoram and lemons. They came out of the oven burnished gold. The marjoram lent sweetness and interest, and the lemons were lightly caramelized and syrupy.

The drumsticks disappeared quickly, and one child begged for more. She then spent the week telling friends in great detail about the delicious meal I made, and has asked me to cook it again.

Like her, I love to eat meat, but I have to admit that I'm no great evangelist. To me, it's more of a guilty secret because, no matter how thoughtful the farming method or how low the food miles, meat means the death of a sentient being with little or no acknowledgement or gratitude. All I can say is that I suspect a responsibly farmed local chicken is more sustainable than Italian pulses and most fish, it's easy to prepare, and it's tasty; and I can choose to give thanks before I eat.

Chicken with Marjoram

- 5 or 6 chicken drumsticks (they're easy for kids to hold, and amusing to play with)
- a lemon
- a big handful of marjoram
- salt
- olive oil

Preheat the oven to 200°C.

Wash the marjoram, and check for bugs. I left mine on the stem, but you can pick the leaves off if you wish. Chop the lemons roughly and randomly, into perhaps a half-inch dice.

If necessary, trim the chicken of any dangly bits. Rub with a little salt. Place in a baking dish with the lemons and marjoram. Drizzle with olive oil, and use your hands to combine. Ensure the marjoram has a little oil on it; otherwise it will dry out and burn.

Roast at 200°C for 35 minutes. Turn the drumsticks over, and roast for another 20 minutes at 160°C or until they are golden.

Roasting temperatures from the very useful How to Eat by Nigella Lawson; the food porn photograph of a goose and apples is in her absolutely wonderful book Feast: Food that celebrates life. Photograph shows a piece of chicken which is clearly not a drumstick; sometimes I use drumsticks, other times, every part of a chicken I can get my hands on!

(Local: chicken, marjoram, lemons, olive oil. Not local: salt.)

Wednesday, November 3, 2010

How to eat an artichoke

I came to artichokes like I came to babies: ignorant, and full of trepidation.

The first time round, having a baby seemed like a nice idea, if a little weird. But as my belly grew and grew, I began to get anxious. I realised I didn't have a clue how to care for one. I didn't know anyone with a newborn; I didn't know who to ask. Until I had my own, I never held a baby, and I learned everything I needed to know from books and professionals. It was a bit hit and miss there for a while, but somehow we muddled through – and now I'm quite baby-mad!

Similarly, I never ate a fresh artichoke until I grew my own. There was a certain gap in the garden. The soil was dry; the other plants in the bed were silvery-grey; and I needed something that would grow quick and fast. So I planted an artichoke. It shot up and out and filled the space, just as I had hoped. But as for eating the things...

Well, last year, I felt anxious. I dithered, and picked the artichokes late; they were tough and tasteless and the choke was full of fluff.

This year I am better prepared, more confident. The other night I wandered out with a knife and cut seven tight buds from the plant, gloating all the while; then I cooked them up for dinner.

I served them with warm melted butter flecked with parsley. My husband and I ate our artichokes with gusto, dipping leaves into the butter, slurping and sucking, and letting the juice run down our chins. Had we not had three young squabbling children present, only one of whom would try their artichoke – the same child who later sent the other four members of the family berserk so that there was a great deal of screaming and no songs at bedtime – the experience might have been quite erotic. Alas, my friends, that is the story of my life.

Artichoke

O heart weighed down by so many wings

Quite so. Thank you, Joseph Hutchison (as quoted in Ted Kooser's delightful book The Poetry Home Repair Manual).

Just Artichokes

- artichokes
- a lemon
- a bay leaf
- salt
- a great knob of butter
- a few stalks of flat-leaf parsley

Bring a large nonreactive pot of water to the boil. (An aluminium pot will discolour the artichokes and itself.)

Prepare the artichokes by slicing off the top quarter or so of the head, and rubbing the cut surface with lemon juice. Remove the bottom two rows of leaves, and rub those surfaces with lemon, too. Leave at least 10 cm of stalk, as the inside of the stalk is delicious.

Salt the water and throw in a bay leaf or two. Drop the artichokes into the pot. Weigh down with a curved pot lid or plate to keep submerged, and boil for 20 minutes, or until tender.

Chop the parsley finely. Melt the butter, and stir in the parsley.

When the artichokes are done, remove from the pot and leave upside down for a minute to drain.

Serve. To eat, tear off the leaves one by one, dip them into the butter, and, using your front teeth, scrape the morsel of flesh from the base of the leaf into your mouth. Rip open the stalk, and pull out the tender strip. Dip it, and eat. When you get to the heart, peer at it. If it's hairy, discard it. If it's young and tight and smooth, as once were we all, demolish the lot, smacking your lips and sighing with pleasure from time to time.

Many books describe how to prepare an artichoke in great detail. See, for example, Maggie's Harvest by Maggie Beer, or The Cook's Companion by Stephanie Alexander. Maggie suggests cooking the artichokes with bay leaves; Stephanie, serving them with parsley butter.

(Exceedingly local: artichokes, lemon, bay leaves, parsley. Not particularly local: butter, salt.)


Wednesday, October 27, 2010

Leek Tart

What fools those food writers think we be. Time and again I make a recipe and it is clear that there is twice as much sauce as should be, or stock, or sugar; time and again I look at a picture, and it is not what it claims to be. The latest offender is Maggie Beer. In her gorgeous if somewhat precious book, Maggie's Harvest, we have a full-page picture of a 'Pumpkin Picnic Loaf'. I asked my four year old to examine the photograph and tell me what was in the sandwich. 'Um, pumpkin,' she said. 'Feta or maybe chévre. Onions. Basil.'

Correct. My four year old can identify the ingredients in a photograph of a sandwich. And in the recipe, do we have feta or chévre? Onions? Basil?

No, we do not. Not a skerrick. The recipe calls for gruyere, not a white goats cheese; zucchini, not onions; and parsley. While the basil in the photograph could possibly be baby spinach leaves – also absent from the recipe – it could not by any stretch of the imagination be parsley.

Now, the recipe looks good. The sandwich looks better. But the disjunction between the two makes me mistrust the recipe and the writer, and I feel slightly miffed – how stupid do the editors think I am, that I can't identify the ingredients in a full-page photograph?

On the bright side, it gives me permission to make the sandwich the way I want – and when I make it, I will use chévre and onions.

As I think about not following recipes, I find myself recalling last night's leek tart and salivating. We had a dozen people for dinner, plus kids; so I made a green tart and a leek tart (doubling the pastry recipe to make two tart cases, of course), a cabbage and apple coleslaw, and a beet and pumpkin salad. Someone brought roast chickens, and that, plus 5 or 6 bottles of wine, formed the main course. Not too shabby for a Tuesday.

Every recipe I have seen for leek tart uses cream and, usually, egg yolks. As much as I love cream, I usually find it a bit rich in a savoury tart. So I made my tart with full cream milk and whole eggs, and it was simply delicious. The tart came out of the oven burnished gold, and the filling simply melted in the mouth. Perfect.

The recipe follows the Green Tart recipe almost exactly; even so, I will post it in full so you can follow it without referring to the Green Tart recipe.

Leek Tart

For the pastry:
- 120g flour
- 50g unsalted butter
- 3 tbs water
- pinch salt

For the filling:
- 1 large, 2 medium or 4 skinny leeks
- a skerrick of freshly grated nutmeg
- 200g cheddar cheese
- 5 eggs
- 1 ½ cups milk

Make the pastry: Place the flour, a pinch of salt and the butter in a food processor. Process for 30 seconds, or until the butter and flour are incorporated; there will be no loose flour flying around. Add the water a tablespoon at a time, and process for another 30 seconds to a minute or until the mixture resembles tiny soft pebbles.

Flour the bench and a rolling pin. Tip the pastry onto the bench, and gently form into a flat disc with your hands. Roll it out, rolling from the centre to the edge and turning 90 degrees between each roll, until it fits your dish. (Mine is 25cm in diameter.) Drape the pastry over the rolling pin and lift it carefully into the dish. Pat into place. Trim the edges. Place the dish into the freezer, and leave it there until you need it.

Preheat the oven to 180C.

Top and tail your leek(s). Slice down the middle, and fan out under running water to remove any trapped dirt. Shake and pat dry. Slice into half moons about ½ cm wide.

Melt 50g butter in a wide skillet. Add the leeks and a pinch of salt, and leave over medium-low heat to sweat for 30 or so minutes, or until the leeks are incredibly soft. Do not let them colour. Leave to cool slightly.

Grate the cheese. Beat the eggs lightly, then whisk in the milk with a skerrick of nutmeg.

Remove the tart shell from the freezer. Spread the grated cheese over the base. Spoon the leeks over the cheese, then gently pour the egg and milk over the leeks. Slip into the oven for 45 minutes or until the top is puffy and golden.

Leave to cool for at least ten minutes, during which time it will set further, before serving.

(Local: leeks, eggs, milk. Not particularly local: flour, butter, cheese, nutmeg, salt, pepper.)


Tuesday, October 26, 2010

Green Tart


Late in rainbow chard season, the leaves become extraordinarily wrinkly. I cut out the toughest part of the stem, wash the leaf, and find myself thinking always of old judges. The wet leaf hangs in my hand like a judge's wig, crimped and curled and ready to drape over head and shoulders. I think of red velvet robes and white ruffs; hooked noses and pinched faces with mouths like cats' bottoms, gavels held in gnarled and knobbly fists; or perhaps ruddy cheeks, a brandy-nose, and piggy eyes sunk deep in fat. I'm swimming in some Dickensian world of dark timber and ominous shadows; then the voice of one of my children breaks through, and I surface again to cook dinner.

It doesn't say much for my view of the judiciary. Perhaps I ought to accompany my husband – a lawyer – to court one day and see a young modern judge wearing slacks. But then where's the fun?

This week rainbow chard, beet leaves and warrigal greens made their way into a tart sort-of-thing. It's what I make when the egg carton's full and warrigal greens are surging over the garden path.

Green Tart
For the pastry:
- 120g flour
- 50g unsalted butter
- 3 tbs water
- pinch salt

For the filling:
- a bunch of greens. (This week I used about 500g greens, a combination of rainbow chard, beet leaves and warrigal greens*.)
- 6 anchovies (optional but good)
- a few strips of lemon zest, chopped very finely
- 200g cheddar cheese
- 6 eggs
- 2 cups milk
- a sprinkling of pine nuts (also optional, also good)

Make the pastry: (This is exactly the same base as Onion Tart.) Place the flour, a pinch of salt and the butter in a food processor. Process for 30 seconds, or until the butter and flour are incorporated; there will be no loose flour flying around. Add the water a tablespoon at a time, and process for another 30 seconds to a minute or until the mixture resembles tiny soft pebbles.

Flour the bench and a rolling pin. Tip the pastry onto the bench, and gently form into a flat disc with your hands. Roll it out, rolling from the centre to the edge and turning 90 degrees between each roll, until it fits your dish. (Mine is 25cm in diameter.) Drape the pastry over the rolling pin and lift it carefully into the dish. Pat into place. Trim the edges. Place the dish into the freezer, and leave it there until you need it.

Preheat the oven to 180C.

Boil a pot of water. Wash your greens well, and chop coarsely. Blanch the greens in several batches, cooking each batch for a minute then scooping out to drain in a colander.

Warm a swirl of olive oil in a wide skillet with the anchovies. Push them around until they are a sizzling paste, then add the greens and the lemon zest. Stir to combine, then leave to cool. If you are worried about someone getting a chunk of anchovy, briefly pulse-chop the mixture in a food processor until combined, but before it is sludge.

Grate the cheese. Beat the eggs lightly, then whisk in the milk.

Remove the tart shell from the freezer. Spread the grated cheese over the base. Spoon the green mixture over the cheese, then gently pour the egg and milk over the greens. Strew pine nuts over the top, then slip into the oven for 45 minutes or until the top is puffy and there is just a very slight wobble in the centre.

Leave to cool for at least ten minutes, during which time it will set further, before serving.

*If you are using warrigal greens, also known as New Zealand spinach or tetragon, it is absolutely imperative that you blanch them first. They contain high levels of oxalates, which can cause a tightening of the throat, nausea and worse when consumed in large quantities. Blanching removes the soluble oxalates and also some of the salts. Leave the lid off the saucepan while blanching so that condensation does not drop back into the saucepan, and discard the blanching liquid.

For more on warrigal greens, see Wild Lime: Cooking from the bushfood garden. This book is out of print, so hard to find; but the author has more recently written the glossier Wild Food: 100 Recipes Using Australian Ingredients, no doubt also worth a look.

(Local: greens, lemon, eggs, milk. Not particularly local: flour, butter, cheese, anchovies, pine nuts, salt, pepper.)

Saturday, October 23, 2010

Broad beans and chicory


Each year I plant broad beans. Each year I realise with dismay that yet again I haven't planted a quarter the plants I need to feed a family, and have to top up our harvest with store bought beans.

Broad beans are ready to pick just when the mint goes ballistic. For all the dire warnings I received about mint – that it would invade our garden and I'd never be able to contain it – I lost a dozen plants before I hit on the outlandish idea of growing it in an old bathtub filled with potting mix and compost. The tub provides room for their roots to go deep. I can dump in a bucket of water from time to time to keep it moist. When it's looking seedy I throw in a handful of desiccated chook poo and it takes off again. And, because every mint plant I've ever grown naked has been quite literally munched to death, the lot is draped over with small gauge bird netting, so small that no butterfly or cabbage moth can get in and lay their dratted eggs.

For the last few years we've had the biggest mint harvest in Brunswick, I am sure – a bathtubful. We eat it in tabouleh, we use it in drinks, we toss it through salads. And, of course, we use it to flavour broad beans.

This broad bean and chicory mix is delicious served atop bruschetta: thick sourdough bread brushed with olive oil and grilled on a hot cast iron ridge pan until criss-crossed with char lines. In the absence of a cast iron griddle, you can also serve it atop a nice thick piece of toast.

Broad beans with chicory

- 1 kg broad beans in their pods
- 500g chicory or other strong green, washed and chopped coarsely
- 8 to 10 stalks mint
- 2 cloves garlic, peeled and sliced
- 6 to 8 anchovies
- a lemon
- olive oil
- salt, pepper

Pod the broad beans. Bring a pot of water to the boil. Cook the broad beans and mint for 5 or so minutes – less for very young beans, more for very old ones. Drain. If the beans are very large, pop them out of their grey skins. Otherwise, leave them as they are. Drizzle with olive oil.

Warm a good swirl of olive oil over medium heat in a wide skillet. Add the anchovies and garlic, and sprinkle with salt. Stir constantly until you have a paste; but take care not to scorch the garlic.

Add the chicory, and stir. Clap the lid on, and leave it to wilt.

When the chicory has wilted, add the broad beans. Stir well to combine. Dress with lemon juice, and a drizzle with a little more olive oil if you wish. Serve.

Simplified and adapted from a recipe in The River Cafe Green Cook Book.

(Local: broad beans, chicory, mint, garlic, olive oil, lemon. Not local: anchovies, salt, pepper.)

Photo shows chicory with borlotti beans, another good option!

Wednesday, October 13, 2010

Hollandaise Sauce

Some couples come back from their tenth wedding anniversary pregnant. Us, we came home with an assignation. And a couple of weeks later, as arranged, my four-year-old and I headed up country and met with an eccentric man wearing a gaudy apron; we came home with four chickens.

Now these ladies are pecking and preening their way around our garden. They gobble up slugs with relish; they eye off the weed seeds and strip them clean; they endlessly turn over the compost heap; they peer in our windows and check what we're up to; they follow us around as we work in the garden. And they lay eggs.

We are totally smitten. My four-year-old spends hours each day carrying one chook or the other, or sitting on a little wooden chair in the run and chatting with them as they peck around her ankles. My six-year-old came home from school yesterday. 'I'm tired and cross,' she announced, then went and read with the chickens. She came in an hour later much refreshed. And I stand at the kitchen sink, looking out and laughing at the little heads peeking out from behind a flowerpot or popping up from a clump of grass.

All of us, young and old, crow with delight when we find an egg. It's like finding treasure two or three times a day. And I find myself wondering, what took me so long?

I can castigate myself for putting it off. Or, better, I can celebrate that we have an abundance of fresh eggs just as asparagus comes into season. Between asparagus, eggs, and a lemon from the neighbour's tree, we're most of the way to poached eggs and asparagus with hollandaise sauce.

I trim the asparagus and simmer it for a few minutes in a wide skillet until just cooked – not squishy, but not crisp either; meanwhile, I poach eggs in another skillet. And in a breathtaking feat of kitchen management, while the asparagus and eggs are cooking I whip up this hollandaise sauce ready to blanket the lot.

For more on how to poach an egg, click here.

Hollandaise Sauce

- 2 egg yolks (freeze the whites for meringue)
- 2 tbs cream or top milk (that is, the first bit of a bottle of unhomogenized unshaken milk)
- 1 tbs lemon juice, or to taste
- 4 tbs unsalted butter
- salt, pepper

Put the 4 tbs butter somewhere in easy reach.

Place the yolks, cream, lemon juice and salt into a deep pan. Whisk together. Heat over a medium flame. Holding the saucepan with one hand, whisk rapidly and continuously with the other. Make sure you whisk right to the edges of the pan.

The instant it thickens, take the saucepan off the stove – keep whisking – and walk to the butter. Throw it in, and whisk and stir until it is combined.

Serve.

Precautions: Do not stop whisking or you'll end up with scrambled egg yolks. If you are timid, you can make it over a double boiler (or a bowl resting over a saucepan of simmering water), but the double boiler method usually results in a thin undercooked sauce. Using direct heat is riskier, but as long as you remain observant it is easy and quick.

Adapted from a recipe in Robert Farrar Capon's The Supper of the Lamb, reviewed here.

(Local: eggs, cream, lemon, asparagus. Not local: butter, salt.)

Tuesday, October 5, 2010

Pasta with Buttery Broccoli and Cauliflower

Once upon a time, before I knew myself much at all, I studied pure mathematics. I was entranced by the beauty of the world, and thought maths might be a way to understand it. Now I no longer need to understand, but instead want only to appreciate and celebrate what is before me; and I do this through words and people.

So I have forgotten almost everything I learned; but every now and then I still stumble across an intriguing mathematical observation. For example, I recently noticed that a cauliflower is a fractal. Simply put, this means that its large florets and small florets repeat elements of the same mathematical pattern.

Next time you have a cauliflower in your kitchen, take some time to look at it. Sit down, and examine the curd. Notice its whorls, how the florets are like little trees, from which smaller trees branch; notice how the branches cluster. Break off a floret, and compare its form to that of the whole you have just observed. Now break a little floret off the bigger floret, and compare the two. Continue until you cannot separate the florets without damage. If you have a magnifying glass handy, peer at the smallest floret, and see how it continues the pattern you have observed on the largest.

For a mathematical description of what is going on, click here.

Or, if you are more poetically inclined, merely murmur to yourself,

Big fleas have little fleas,
Upon their backs to bite 'em,
And little fleas have lesser fleas,
and so ad infinitum.

(Which reminds me of a photograph of a flea I once saw, taken through an electron microscope. Upon its back, lodged in the crevices, one saw mites. As someone who has always been very attractive to fleas, mosquitoes and March flies, it was nice to know that, from time to time, justice prevails.)

By now, between the maths and the fleas, I have probably put everyone off their grub. Nevertheless, here’s a recipe. I have been eyeing off this suggestion by Deborah Madison for years, but have always been put off by the idea of cauliflower as a pasta sauce. That, and the inclusion of shallots. Madison uses three in her recipe; and she is referring to those tiny tight brown onions, insides tinged purple, whose texture is melting and flavour is sweet; but they are so hard to find.

However, with half a cauli and some broccoli in the fridge and my father coming for dinner, it was time to be brave. I tried the recipe sans shallots. It was delicious. The tiny pieces of cauliflower and broccoli were soft against the pasta; the Dijon and lemon gave character to the unctuous base; and the toasted breadcrumbs provided a delightfully contrasting crunch. I ate two big helpings, and would have gone a third except the men beat me to it.

Pasta with Buttery Broccoli and Cauliflower

- ½ medium-sized head cauliflower
- 1 medium or 2 small heads broccoli
- 7 tbs unsalted butter, at room temperature
- 2 tbs Dijon mustard
- 2 cloves garlic, minced
- 2 tsp balsamic vinegar, or to taste
- 5 or 6 stalks flat-leaf parsley, chopped
- zest of half a lemon, finely chopped
- 1 cup bread crumbs (I chucked a very thick slice of slightly stale bread into the food processor and whizzed until I had an exciting combination of fine crumbs and little chunks.)
- 4 sun-dried tomatoes, chopped
- 300g dried pasta (I used Powlett Hill’s spirals; Madison recommends wide handmade spinach or fresh herb noodles, but then she doesn’t have three young hungry children clamouring for dinner.)
- salt
- Parmesan (optional)

Heat a large pot of water. While it is heating, break the cauliflower and broccoli into tiny florets. You should have 4 – 5 cups of florets.

Place 4 tablespoons of the softened butter with the mustard, garlic, vinegar, parsley and lemon zest into a bowl, and blend using a fork.

Melt the remaining butter in a wide skillet. Throw in the breadcrumbs, and toss and fry until they are golden and crisp. Scrape them into a bowl and set aside.

Once the water is boiling, gently melt the flavoured butter in the same skillet you used for the breadcrumbs. Add the sun-dried tomatoes.

Salt the water, and throw in the cauliflower and broccoli florets. Return to the boil and cook for 1 minute only. Scoop out the florets and place into the skillet with the butter and ¼ cup of the cooking water.

Add the pasta to the boiling water, and cook. Drain the pasta immediately it is done, add it to the skillet and cook for another minute, stirring gently to combine.

Serve sprinkled with a generous helping of breadcrumbs, and some grated Parmesan if you like.

Adapted from a recipe by Deborah Madison in The Greens Cookbook. For some lovely observations on the onion, read The Supper of the Lamb by Robert Farrar Capon; I have reviewed it here.

(Local: cauliflower, broccoli, garlic, parsley, lemon, pasta. Made locally from unspecified ingredients: butter, bread. Not local: Dijon, balsamic vinegar, sun-dried tomatoes, pepper, salt, parmesan.)

Tuesday, September 28, 2010

Spinach Thing

On the weekend there was a warmth in the air that I haven't felt for months. I lay in the grass and soaked up rays like a lizard, and realised that spring is finally coming. We spent the first three months of this year in the northern hemisphere, so we've had two winters. And after ten months of grey skies and rain; after four months of niggling coughs and colds and two hefty bouts of gastro; after the death of two grandparents and after marking the tenth anniversary of my mother's death; well, it's time. Time for warm breezes, apple blossom, and a little sunlight on my face.

And time for an end to strong winter greens; this week, I saw bunches of soft sweet spinach appearing in the shops.

We often make a green pie – a filo pie packed with leafy greens and herbs. But when I want a less cluttered taste – just spinach, onions and chévre, the perfect trio layered in a simple filo envelope – this does the trick.

As it's not quite a pie, nor a tart, nor a slice, I call it a thing.

Spinach Thing

- 4 small or 2 large brown onions
- 1 bunch spinach, washed and trimmed of its stalks
- 150g soft cheese (Meredith Dairy's chévre is breathtakingly good, but you could also use a feta)
- ½ pkt filo
- 50g or so unsalted butter
- olive oil
- salt

Remove the filo from the fridge at least two hours before you want to use it. Check the instructions on the packet for exact times. Preheat the oven to 180C.

Halve the onions lengthwise, then continue slicing them lengthwise into reasonably wide crescents, about ½ cm wide.

Warm a good slosh of oil in a skillet and add the onions. Stir well, and cook briskly medium-high heat, stirring often, until they are a lovely golden colour but still have shape and form. Do not let them stick or brown. This method of cooking will render the onions sweet and fruity.

Tip the onions into a bowl. Turn down the heat, add the whole spinach leaves to the skillet, clap the lid on and let wilt.

Melt the butter in a small pan over the stove, or explode it in the microwave.

Brush a large flat tray (mine is 28cm x 44cm; 11" x 17") with melted butter. Lay two sheets of filo flat on the tray. Brush with butter, add two more layers, and so on until you have 8 layers. Scatter the onions over the filo. Drape the spinach over the onions, using your fingers to unfurl the leaves and spread them evenly. Crumble the chévre with your fingers as you scatter it over the spinach; different sized pieces make it interesting.

Gently place another two layers of filo over the cheese. Brush with butter, taking care not to rip the pastry as you pass over the bumps, and alternate double layers of filo with butter until you have another 8 layers. Brush the final layer with butter.

Slip into the oven and bake for 20 minutes or until the filo is golden. Let rest for five minutes, then cut into squares and serve warm.

Inspired by a spinach thing sold at Big Harvest in Elgin Street, Carlton. I think they call it 'pie'.

(Local: onions, spinach, chévre, olive oil. Made locally from unspecified ingredients: butter, filo. Not local: salt.)

Wednesday, September 22, 2010

Cauliflower Polonaise


When I was a very young pun-loving child*, I used to make flower soup. I'd put water in a bucket, add ferns tips and fuschias, dandelions and buttercups, and whatever else looked pretty, stir it up with a stout stick, and call it dinner.

One morning, a friend of my mother's came over and wandered into the garden to see what I was up to. "I'm making spaghetti pollenaise," I said gleefully. "Oh Alison," she smiled, "It's spaghetti bolognaise, not pollenaise." My mother said I looked over her friend's shoulder at her, rolled my eyes, then went on with what I was doing.

So imagine my delight when I discovered that there is a whole method of playing with vegetables called 'polonaise'. I have no idea if the Polish actually do this, but it's what you call a dish garnished with chopped boiled eggs, breadcrumbs and parsley.

Although I can rarely get enthusiastic about cauliflower (it is, to me, not cabbage with a college education a la Mark Twain, but cabbage rendered bland and distasteful), I find cauliflower polonaise an interesting, even attractive, dish.

And as it evokes happy memories of mud pies and buckets of fuschia petals stirred to a pulp, so much the better.

Cauliflower Polonaise

- 1 head cauliflower, kept whole
- 3 eggs, 4 if you're feeling lavish
- butter
- 1 very thick slice stale bread, grated into coarse breadcrumbs
- 5 stems flat-leaf parsley

Trim the cauliflower of its leaves, and level the stem. Place it stem down into a saucepan in about an inch of boiling water. Cover and steam for 15 minutes, or until a knife can be inserted into the stem easily, but before the florets go mushy.

Boil the eggs by slowly bringing them to the boil, then simmering for six minutes. Remove from the heat, peel under cool water, and chop them finely.

Warm a generous knob of butter in a skillet. When it has melted, add the breadcrumbs and stir and toss for 5 or so minutes, or until the breadcrumbs are golden brown and toasty. Remove from the heat.

Chop the parsley.

When the cauliflower is done, carefully remove it from the water and position it on a large plate. Sprinkle it with the egg, the parsley and the breadcrumbs, and drizzle with extra melted butter if you wish.

Adapted from a recipe in A Canon of Vegetables: 101 Classic Recipes by Raymond Sokolov.

(Local: cauliflower, egg, parsley. Made locally: bread. Somewhere in Victoria: butter)

*Actually, nothing has changed. Click here to check out my cryptic crossword published in Meanjin this month.

Monday, September 20, 2010

Cabbage and Apple Salad


Okay, so I am an apple freak. I eat them every day, in every way – but I haven't been to a doctor in years!

Cabbage and apple salad (what an American would call 'slaw') is lovely and bright. The cabbage, at times a self-effacing old thing ducking to the rear of the crisper, is here cheered up immensely by the juicy sweetness of the apples.

With its palate-cleansing properties, this salad goes well with the earthiness of lentils; or it would be a perfect match for pork.

Cabbage and Apple Salad (Slaw)

- 2 cups green cabbage, preferably Savoy, shredded
- 2 Granny Smith apples, or other large sharp variety
- 1 tsp mustard seeds
- ½ - 1 cup walnuts, chopped (I like it very nutty)
- the juice of a lemon
- ½ tsp Dijon mustard
- 1 tbs apple cider vinegar
- 2 tbs olive oil
- 1 tbs apple sauce (which you have conveniently canned; use the rest of the jar in apple cake)
- salt, pepper

Place the mustard, vinegar, olive oil, apple sauce, salt and pepper in a jar. Screw the lid on tightly, and shake until emulsified. Taste, and adjust ratios if necessary.

Shred the cabbage. Grate the apples, peel and all, or julienne them if you're feeling refined. Place the apple into a salad bowl, and squeeze the juice of a lemon over it. Toss. Add the cabbage and mustard seeds, and toss again. Drizzle the vinaigrette over the salad, and mix gently but well.

Sprinkle the walnuts over the top, and serve.

The original recipes included a bunch of radishes, shredded; but that would make it too peppery for my young family.

Adapted from a recipe in The Wednesday Chef, who adapted it in turn from a recipe by Jeremy Fox.

(Local: cabbage, apple, walnuts, lemon, apple cider vinegar, apple sauce, olive oil. Not local: mustard seeds, Dijon mustard, salt.)

Tuesday, September 14, 2010

No Egg Apple Cake


My husband is a very intelligent man, yet sometimes he asks silly questions. Like, how many apple cake recipes do you have on your blog?

It was innocent enough, and the answer is, not many (yet). But from a man who adores apple cake in every way, shape and form, to a slightly defensive woman who likes to cook it for him and do the dishes afterwards, it was perhaps a question better left unsaid.

Lucky for him, my passion for apple cake obliterates any hint that I have too many recipes. After all, there is an apple cake for every eventuality. There is Kay's Apple Cake, dense with mixed spices and served with vanilla hard sauce, perfect after dinner. It tastes deeply American, and every time I bite into it I am taken right back to Kay's kitchen, where I revel in her conversation and bask in the most joyful, infectious laugh I have known.

There is my mother's Apfelkuchen, a simple cake topped with overlapping rings of apple, which brings back memories of childhood in a little house full of people and papers and orange carpet tiles.

There is also her Danish apple cake, a favourite with adults and especially my father. Mum poured half the cake batter into the tin, layered it with apples, walnuts and ground ginger, then spread the remaining batter over the top. It looks lovely when you slice it, and is heady with ginger; I made it last year for an anniversary picnic held in her memory.

There is the beautifully moist and failsafe apple cake in The Ultimate Cook Book, which I have made dozens of times in a dozen different ways: with white, brown or coconut sugar; with walnut or vegetable oil; with sultanas and without; with cinnamon, cloves, ginger or a mix. Its dense texture makes it very portable – a good one for a picnic – and its size, great for a group.

And then there's this cake, the unobtrusive cake which tells a Wednesday friend that I love them without being splashy; the cake that makes children smile and adults settle into their chairs and begin to tell stories. It's a morning cake, no big deal, just something to share over coffee; or to slip into a lunchbox near the end of term when kids are flagging and could use a little lift.

It happens to have no egg and no dairy, so it's handy for kinder parties and allergic children, not to mention those hairy vegan friends who could use a little sweetening.

No Egg Apple Cake/Vegan Apple Cake

- 150g sultanas (optional)    
- 350g apple sauce or apple purée (I use canned apples, and leave the chunks intact)
- 180g sugar
- 280g plain flour
- 1 tsp bicarbonate of soda
- 1 tsp ground cinnamon
- ½ tsp ground cloves
- pinch of salt
- ½ cup unflavoured vegetable oil (NOT olive oil)
- 2 tbs golden syrup

If you are using sultanas, boil the kettle. Place the sultanas in a small bowl, and barely cover them with hot water. Leave to soak for at least 15 minutes, three days if you get sidetracked as happened to me recently.

Place the apple purée and sugar into a large bowl, stir well, and leave to macerate for 20 to 30 minutes.

While things are soaking and macerating, position the oven rack near the bottom of the oven. Preheat the oven to 180C. Grease and flour a ring tin.

Sift the flour, bicarb soda, cinnamon, cloves and salt into a bowl. Whisk to combine.

Add the oil and golden syrup to the apples, and mix well. Add the flour mixture and sultanas, including any dribbles of syrupy water*, and fold together quickly and gently, lifting up mixture from the bottom of the bowl as you stir.

Pour the mixture into the cake tin. Smooth it gently with a spatula, then quietly slide it into the oven. Close the oven door with dignity. Because the raising agent is bicarb soda, it begins to rise the instant the liquid hits the bicarb. If you bang it about, you will lose the bubbles and thus the rising. Be not afraid, but be quiet.

Bake for 50 minutes, or until a toothpick comes out clean.

Leave to cool in the tin for at least 15 minutes. Run a knife around the edge, invert over a cake plate, and serve.

*If you did not barely cover the sultanas with hot water, but instead drowned them, drain them before adding them to the mixture.

(Local: sultanas, apples,. Not local: sugar, flour, bicarb, spices, salt, oil, golden syrup.)