Wednesday, June 30, 2010

Chickpeas and Silver Beet

 
Ah winter, season of pulses and strong greens. We make some combination – chickpeas and silver beet, borlotti beans and chicory, lentils and spinach – at least once a week.

The following is a flexible recipe. You can vary the proportions of chickpeas to greens; vary the greens used (silver beet, rainbow chard, beet leaves, spinach and chicory all work well); and adjust the aromatics (onions, leeks, and herbs). You can make it wetter and call it soup; toss it through pasta and call it sauce; or pile it high on grilled bread and call it bruschetta. Or do as we do: serve it on bruschetta – made from a good sourdough brushed with olive oil and grilled – and eat the leftovers as soup for lunch the next day. Feeling like a bit of cheese? Sprinkle it with parmesan. Totally ravenous? Slip a poached egg on top.

However you serve it, this is a complete meal: warm and satisfying. The carrots and red onions make it oh so sweet; and the lemon juice brightens and lightens the flavours. It's so delicious that adults find it hard to stop picking – and, ever so thrillingly, my three young children all like it.

Chickpeas and Silver Beet

- 250g dried chickpeas, soaked for a night or two
- 2 cloves garlic, peeled
- 2 small red onions, finely chopped
- 1 or 2 leeks, halved, cleaned well and white parts sliced into narrow ribbons
- 2 carrots, peeled and diced small
- 250ml white wine (I use a cheap but not unpleasant Riesling)
- 2 tbs tomato paste
- 500g silver beet or other sturdy green, washed, stems removed, and chopped
- 10 to 15 stalks Continental parsley, leaves separated from stems, chopped
- 1 lemon, juiced
- olive oil

Place the chickpeas into a large pot with the garlic cloves and a drizzle of olive oil. Cover with cold water, bring to the boil, then simmer gently until soft: 45 minutes to 1½ hours, depending on the age of the chickpeas and how long they were soaked. Skim if necessary. Salt, and leave in their liquid until needed.

Warm a good swirl of olive oil in a wide skillet. Add the onion, leek and carrot and cook gently for 20 minutes, or until the carrots are tender but not brown. Add the white wine and tomato paste, stir to combine, then simmer until almost completely reduced.

Add the silver beet, then clap on the lid and steam until the silver beet wilts, 5 to 10 minutes. Give it a stir every now and then. Add the parsley and the chickpeas, along with half a cup of the chickpea cooking liquid, and cook gently for another 10 to 15 minutes to combine the flavours.

Add the lemon juice, and serve with a drizzle of extra virgin olive oil to finish.

Tumble over bruschetta, toss through pasta, or make it wetter with more chickpea liquor and serve it in a bowl.

This is my own combination, developed from recipes in The River Cafe Cookbook by Rose Gray and Ruth Rogers, and The Savory Way by Deborah Madison. Photograph shows a version with beet leaves and curly kale.

(Local: silver beet, carrots, red onions, leeks, garlic, white wine, parsley, lemons, olive oil. Victoria: chickpeas. Origin unknown: tomato paste.)

Sunday, June 27, 2010

Lemon Butter

My mother had mixed feelings about lemon butter. She had been told that undercooked eggs were unhealthy and dangerous, probably crawling with microbes – and yet she loved it. So she'd never make the stuff and 'tsk' when she saw it at the church fete, then buy it anyway and slather it on her crumpets. In the same way, she'd let us lick out a cake bowl, all the while fretting aloud that we'd come down with listeria or salmonella or some other nasty little bug from raw egg. We never did.

Me, I'm not worried. We get eggs fresh from a farm, and my daughters and I always make sure there's enough cake batter left to get a good scrape each with the spatula. And I even make my own lemon butter.

I tend to make it at night when the house is quiet. Although it's quick and easy, it requires vigilance; and it brings on a precious meditative state which I prefer not to have interrupted by short people.

If you're making a single quantity and intend to eat it quick, wash your jars in very hot soapy water, then pop them in a cool oven to dry completely before filling with lemon butter. That's what I did until I had babies and you can too – just don't blame me if you get food poisoning. These days, however, I sterilize my jam jars. I have a baby bottle steam sterilizer needing a new job, and it fits four jam jars rather nicely. It's the one advantage I know of having bottle-fed babies!

Lemon butter keeps for a month or two in a cool place. Once the jar is opened, store it in the fridge.

Lemon Butter

- 2 large juicy lemons, or 3 not so juicy lemons
- 100g unsalted butter
- 175g sugar, and it must be refined white sugar; brown sugar will turn a delicate trembling little butter into an unattractive brown sludge
- 3 eggs, lightly beaten

Grate the zest from the lemons, or zest the lemons then chop the ribbons into tiny segments. Juice the lemons. Place the zest and the juice into a heavy-based saucepan with the butter and sugar. Heat gently, stirring until the sugar has dissolved.

Take off the heat and leave to cool a little. Add the eggs through a strainer, and mix to incorporate. Place back onto a gentle heat and stir constantly until the mixture has thickened. You must not let it boil, or it will curdle and separate. The moment it looks velvety, take it off the heat, and pour into hot jars.

This makes enough for two medium jars: one for you, and one for the neighbour who gave you the lemons. At least, that's how it works in our house.

Spread it on toast or crumpets, or use it to make little lemon tarts.

A traditional recipe; I use the proportions from The Cook's Companion by Stephanie Alexander.

(Local: lemons, eggs. Non-local: butter, sugar.)

Saturday, June 26, 2010

Pumpkin Soup


Ah, Saturday morning. I'm in my pyjamas, the washing machine's on, the kids are happily drawing. Time to turn up the stereo and make soup.

For two weeks, I've been saving up pumpkin from the box. It goes well with red onions, which are softly sweet, and the delicate flavour of marjoram. If you need to use brown onions, consider swapping the marjoram for thyme, as marjoram can be overpowered by brown onions.

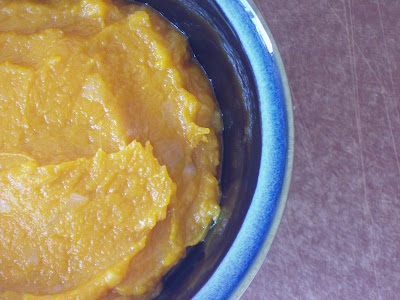
The soup is velvety smooth. As my family quoted sections of Pumpkin Soup by Helen Cooper, I added 'a pipkin of salt' a la the duck; and my toddler happily banged her spoon on her bowl shouting "More! More!" as she ate. Happy kids, warm soup and a good sourdough bread: now that's what I call Saturday lunch.

Pumpkin Soup

- 2 kg pumpkin, peeled, seeded and roughly cubed
- 5 tiny red onions, or fewer bigger ones, or even a brown onion
- 4 cloves garlic, bashed with the flat of a knife and chopped
- lots of marjoram, maybe 2 tbs leaves all up
- 1 to 1½ litres chicken stock
- olive oil

Warm the olive oil in a large soup pot. Fry the onions gently until they are soft and translucent. Add the garlic and the marjoram, and fry for another minute. Add the pumpkin, and fry for a few more minutes, stirring from time to time.

Add the chicken stock and a little water if you need; the liquid should barely cover the pumpkin. Simmer until the pumpkin is soft, about half an hour.

Put it through a food mill or a food processor. It should be thick enough to leave a dent when touched with a spoon. Season and serve.

(As you can see in the photo, there are times when I just leave it rough and ready, mashing it only with a stout wooden spoon; but for supreme smoothness, pass it through a food mill!)

(Local: pumpkin, onions, garlic, marjoram, olive oil, and most of the ingredients of the chicken stock.)

Chicken Stock


In one of our many inconsistencies, although we don't cook meat we do use chicken stock. It gives some vegetarian food – especially pumpkin soup – a depth of flavour that is difficult to achieve otherwise.

By chicken stock, I mean the real deal: unctuous, heavenly scented stock made from the bones of a genuine dead chook. If we picnic with friends, I beg the bones of the roast and make it; or if it's been a while between picnics, I buy a carcase from our local supermarket for the princely sum of $1.20 a kilo.

Chicken bones are usually thrown away, so I figure I may as well use this otherwise waste product. I like using things up! I also throw in any fennel tops I've saved from the top of a bulb, and those half eaten carrots and stalks of celery that sometimes come home in a kid's lunchbox. If there are some forgotten mushrooms floating around the bottom of the fridge, I put them in too; they give the stock a stronger, more woodsy flavour.

I'm not being particularly try-hard by making my own stock. For one thing, commercial stocks taste so harsh and salty; and many of them give me a thick tongue, sore throat and headache, so there's some little nasty in there that I don't tolerate very well.

But the real reason I make my own stock is that it's so delicious – and easy. This is how to do it: after dinner, put the kids to bed. Throw all the ingredients into a large pot, bring to the boil, then turn down to a simmer. Go and watch Miss Marple, or perhaps Bones. When it's finished, come into the kitchen and strain the stock. Chuck the things in the dishwasher. Put the stock in the freezer. And that's pretty much it.

Chicken Stock

- 1 chicken carcase, raw or from a roast
- 4 little red onions, or 2 brown onions, peeled and quartered
- 4 cloves garlic, bashed with the flat of a knife blade and the skins flicked off
- 1 stalk celery, coarsely chopped
- 1 carrot, peeled and coarsely chopped
- some fennel stalks, if you have them, coarsely chopped
- 3 or 4 stalks flat-leaf parsley
- 2 bay leaves
- 5 peppercorns

Place everything into a large soup pot and cover with 1½ litres of cold water. Bring to the boil, then turn down to a simmer. Skim off any gunk that floats to the surface.

Simmer for 1½ hours or so. Strain – I run it through a colander, then a sieve – then season to taste. For a clearer stock, run it through a coffee filter.

If I'm not using the stock immediately, I freeze it in single cup portions, easily defrosted for soup or risotto.

(Local: red and brown onions, garlic, celery, carrot, parsley, bay leaves. Unknown: chicken bones, fennel. Not local: peppercorns.)

Tuesday, June 22, 2010

Ribollita, or A Very Thick Kale Soup

Once upon a time many moons ago, we went to Italy. We took our nine month old baby, and stayed in the house of an older couple who brought down food for her every day. Along with sweet and savoury focaccia, and fresh eggs and squash blossoms from the garden, they gave us great vats of soup for "la bambola, la principessa"*. The soup was thick and chock full of beans and vegetables; our little one gobbled it up for lunch and dinner most days and happily waved her spoon about while the rest of us looked on longingly, sneaking a taste here and there.

This week, when I saw the kale in the veggie box, I was reminded of the senora's soup. The kale was beautiful: smoky blue with violet stems and veins. I picked up an extra bunch of mixed kale at a local shop, also gorgeous: some bright green with crimped edges; some deep purple. So with my three lots of kale, so pretty on the bench, I was ready to make one of those ultra-thick Italian-style soups.

The soup is pretty ugly; it looks like wet compost. But the extra virgin olive oil, swirled in at the end, brightens the flavours, and the whole tastes rich and dark and wonderful, perfect for a cold winter's night.

If you don't have kale, you could use chicory, silver beet or rainbow chard, or a combination of strong greens – for that matter, I threw in a bunch of beet leaves.

(*the doll, the princess. Er, right.)

Ribollita, or A Very Thick Kale Soup

- 1 bunch flat leaf parsley, chopped
- 3 red onions, chopped
- 4 cloves garlic, bashed with the flat of a knife blade then chopped
- 1 entire head celery, chopped
- 1 very large carrot, or 2 smaller carrots, peeled and chopped
- 1 can tomatoes or 5 or 6 tomatoes, deseeded and chopped, or a jar of home preserved tomatoes
- 1 kg kale, stalks removed, leaves chopped
- 1 can borlotti beans
- 2 cans cannellini beans**
- 1 ciabatta, crusts removed, torn into pieces
- olive oil

Warm a swirl of olive oil in a large soup pot, and gently fry the parsley, onions, garlic, celery and carrot for 20 to 30 minutes, or until the flavours have melded. Add the tomatoes, and cook gently for a further 20 to 30 minutes, stirring from time to time. Add the kale and the beans, and enough liquid to cover everything. Simmer for half an hour or longer.

Whizz a third to a half of the soup (I used the pulse function on the food processor), and return it to the pot along with enough boiling water to make the soup wet but not runny – it's supposed to be thick. Think 'stew' not 'soup'. Stir in the bread, drizzle with a generous amount of extra virgin olive oil, season and serve.

This feeds 6 to 8 adults.

**Of course, you can use dried borlotti or cannellini beans or a combination of the two, soaked overnight and cooked, in which case use the cooking liquid to thin the soup.

Adapted from a recipe in River Cafe Cookbook by Rose Gray and Ruth Rogers.

(Local: parsley, red onions, garlic, celery, carrot, kale, olive oil. Made locally from non-local ingredients: bread. Definitely not local: canned beans, canned tomatoes – although if you canned your own tomatoes last summer, you'll be fine!)

Thursday, June 17, 2010

Warm Cauliflower Salad

I've never understood why cauliflower and cheese, macaroni and cheese, rice pudding or baked custard are so often referred to as nursery food. My children loathe and detest anything with a creamy sauce; they'd prefer to relinquish the chance of dessert than to have even an exploratory nibble. From time to time I long for a cheesy bubbly dish with a crusty golden layer on top; alas, it is not to be – at least for now.

So this week, with a cauliflower in the box, I had to think of something else. I flipped through my recipe books, and came up with this. Miss Six gave it an 7 out of 10, which meant she ate a large piece without comment; Miss Four, who is passionate about dukkah, gave it a 3 out of 10, which meant she licked the dukkah off and accidentally ate some cauliflower; but, just like Goldilocks with Little Bear's porridge, I ate mine all up and looked for more.

Dukkah is a mixture of ground seeds, nuts and spices. There are many different mixes available. Our favourite is Paddymelon's Wartaka Dukkah, which includes lemon myrtle, aniseed myrtle and other Australian herbs. It has a lovely fresh flavour; however, any dukkah, perhaps one fragrant with cumin, would also work well. You can find out more about dukkah and order it here.

Warm Cauliflower Salad

- 1 head cauliflower, broken into large florets
- ½ bunch coriander, washed and the leaves taken off the stems
- 1 can chickpeas, or some Victorian chickpeas soaked and cooked, optional (why aren't Australian pulses canned?!)
- 1 juicy lemon
- a good extra virgin olive oil
- dukkah

Bring a large pot of water to the boil. Drop the cauliflower florets in and simmer with the lid off for 7 or 8 minutes, or until a knife blade slips into the stem easily but before the florets are mush.

While it is cooking, warm the chickpeas.

Drain the cauliflower and place onto a platter. Spoon the chickpeas around the florets, then drizzle with olive oil and lots of lemon juice. Sprinkle 2 or 3 teaspoons of dukkah over the top – enough so every floret is lightly dusted. Scatter the coriander leaves over the top, and serve at once.

Developed from a suggestion by Nigel Slater in The Kitchen Diaries: A Year in the Kitchen.

(Local: cauliflower, coriander, lemon, olive oil. Made locally from imported ingredients: dukkah. Imported: chick peas, although you could use Victorian chickpeas.)

Tuesday, June 15, 2010

Apple Cake


It was a public holiday, time for a picnic. Other people were bringing soup, a savoury tart, a chicken, some wine. I was asked to make dessert. With a house full of apples, the only difficulty was choosing which apple cake to make!

This is our current favourite. The secret ingredient is walnut oil; it makes the cake beautifully fragrant. But if you're feeling thrifty, the cake is still lovely made with vegetable oil instead.

Lately I've been fooling around with palm sugar. With its light floral scent floating above rich toffee flavours, it tastes absolutely wonderful. I thought it would go beautifully with the apples and walnut oil, and it did. But I must admit I had an ulterior motive: I was hoping a particular friend would come to the picnic – and I thought I could tempt her with a slice of cake if only I could say 'it's low GI'! Palm sugar has a GI of 35.

Apple Cake

- 6 apples, peeled, cored and cut into 1 cm dice
- 1 cup sugar (plain or palm)
- 2/3 cup walnut oil (or vegetable oil, or a combination)
- 2 eggs, at room temperature
- 3 cups plain flour
- 2 tsp baking powder
- 1 ½ tsp cinnamon
- ½ tsp baking soda
- pinch salt

Preheat your oven to 175C/350F. Grease a large cake tin; I use a 24cm spring form pan.

Combine the apples and sugar in a large bowl and leave to macerate for half an hour – or, if you're short of time, you can zap them in the microwave for 5 minutes, then leave for another 5 minutes to cool down.

Sift the flour, baking powder, cinnamon, baking soda and salt into a bowl.

Whisk the oil and the eggs in a separate bowl until they are light and creamy. Scrape into the apples and combine, then fold in the dry ingredients. This very stiff batter has snapped at least one of my spatulas, so take my advice and use a sturdy wooden spoon!

Scrape the batter into the cake tin and bake until lightly browned, or until a toothpick inserted into the cake comes out with a few moist crumbs attached. This will take between 45 minutes and an hour depending on your oven – start testing at 45.

This cake is superb with a dollop of thick cream.

Adapted from The Ultimate Cook Book: 900 New Recipes, Thousands of Ideas by Bruce Weinstein and Mark Scarborough.

(Local: apples, walnut oil, flour, eggs. Not local: baking powder, baking soda, salt, veggie oil. Also not local, but at least it's fair trade: sugar, cinnamon.)

Sunday, June 13, 2010

Spaghetti and Mussels


My grandfather used to tell of long summer afternoons eating shellfish. He and his mate would each bundle up a salt shaker and a stout knife in a clean hanky, tie it to his head, and breaststroke to a rocky outcrop off the coast of Western Australia. There they would scramble up and collect oysters, then spend the afternoon shucking and slurping, slurping and shucking, throwing the shells back into the sea as the waves lapped at their feet.

I think of that story whenever we eat mussels, oysters being in short supply in our house.

Yesterday we bought a bag of bay mussels. They were fat and succulent and smelled of the sea. We demolished them in minutes. As long as your mussels are fresh, it takes almost no effort to make something absolutely delicious. If they're not fresh, don't buy them.

The following is how to make spaghetti and mussels for a family in which some people love mussels and others barely tolerate them. If you are in the privileged position of eating with civilized people – mussel-lovers all – skip the spaghetti and tomato sauce bit, throw the parsley into the mussel pot, and serve your mussels with fresh white bread instead to sop up all the lovely briny juices.

Mussels

- 1½ - 2 kilos mussels
- 4 cloves garlic, squashed with the flat of a knife and roughly chopped
- ½ cup white wine
- a pinch of dried chilli if you don't have children
- a handful of chopped parsley
- olive oil
- 5 or 6 large tomatoes, deseeded and chopped, or a can of tomatoes
- 500 g spaghetti

Bring a large pot of water to the boil.

Discard any mussels that are cracked, or open and refuse to close when you tap them. Scrub and de-beard the mussels. If this feels cruel, just think of the way your great-grandmother would rip the head off a chicken and realise how squeamish you are – then get over it.

Warm half the garlic with the chilli (if you're using it) in a drizzle of olive oil in a wide skillet. Add the tomatoes and leave to simmer gently.

Add the spaghetti to the boiling water, and cook for 8 to 12 minutes, depending on its thickness.

While the spaghetti cooks, warm the rest of the garlic in a drizzle of olive oil in a very large pot. Add the white wine, then the mussels – no more than two deep, so you may have to do this in two batches – and clap the lid on. Cook for 4 or 5 minutes. Remove the open mussels to a large bowl, then cook the remaining mussels for another minute or so. Remove the rest of the opened mussels to the bowl, and, if there are any mussels still remaining closed, discard them. Pop a saucepan lid or dinner plate on the bowl to keep the mussels warm while you finish things up.

Add at least half a cup of the mussel cooking liquid to the tomato sauce, or all of it if you love it as much as I do. Add the parsley.

Drain the pasta, and toss through the tomato sauce.

Serve the spaghetti, with the mussels in their separate bowl for people to help themselves. I usually flick a heap into my spaghetti, then eat; while my four-year-old fastidiously nibbles at her obligatory two mussels, wincing all the way (then announces she "really quite likes them". Grrr.)

Don't forget to put out a big bowl for the shells!

This is enough for two to four adults, depending how much the kids eat.

(Local: mussels, garlic, olive oil, tomatoes, spaghetti, wine, parsley, even the bread if you use it.)

Wednesday, June 9, 2010

Organic carrots...

I wish I could say the champagne's out, but a bottle split with my husband on a quiet Wednesday evening seems a little excessive. But I am excited! I wrote an article on why we buy organic, and it was published here this morning.

Perhaps a celebratory square of fair trade organic chocolate will suffice.

Monday, June 7, 2010

Silverbeet Frittata


Because I was tired, I made a frittata. Ten leaves of silverbeet, six eggs and a handful of parmesan, fifteen minutes, and dinner's on the table.

Because I was tired, I opened a beer.

Because I was tired, I knocked the beer over. It washed over the frittata, which soaked it up like a sponge.

Because we were hungry, we ate anyway. I can't recommend it. Beer soaked eggs are revolting. But the beer-free bit tasted good, and my four year old ate it all up.

Silverbeet Frittata

- 8 to 10 small stalks silverbeet, rainbow chard or beet leaves, about 250-300g
- 1 or 2 cloves garlic, bashed with the flat of a knife then chopped
- olive oil
- 6 eggs
- a handful of parmesan or other hard cheese, grated, or a lump of feta, crumbled
- parsley, or thyme or borage flowers, or other chopped herbs, optional

Separate the leaves from the stalks of the greens. Discard any bruised stalks, but keep the rest. Slice the stalks thinly crosswise, then chop the leaves into ribbons.

Film a wide skillet with olive oil and throw in the garlic. Stir for a few seconds, then add the chopped stalks. Sauté until translucent. Add the leaves, stir and clap the lid on the skillet. Leave for 4-5 minutes or until the leaves have softened, then remove the lid, take off the heat, and leave to cool a little.

Whisk the eggs, then add the cheese and herbs. Season well. Tip the greens into the egg mixture, wipe out the pan, and reheat it.

Film with olive oil again and, when it is nice and hot, pour in the egg mixture. Shake to distribute the greens across the pan.

Turn the flame down and cook over medium heat until the eggs are mostly set, loosening the underside from time to time with a flexible spatula. Place under the griller for a few more minutes to set the top, slide onto a large plate, and garnish with fresh herbs.

Adapted from the bible, aka The Cook's Companion by Stephanie Alexander.

(Local: beet leaves, eggs, olive oil, herbs, feta. Non-local: parmesan, but you could use a local hard cheese instead.)

Sunday, June 6, 2010

Toasted Almonds


In my supermarket, a pack of imported salted nuts can cost a small fortune. Yet the poor things have passed through a factory to be drenched in salt and preservative, stuffed into a stifling little bag and sent across the ocean far far from their mother tree, only to arrive here homesick and tasting of jetlag.

But we have local beer. We need local snacks. What are we to do?

Lucky me, we have an almond tree and we finally picked the last of this year's crop. We collected 7½ kilos, unshelled, from the small neglected tree in our inner suburban backyard. As I was on my hands and knees looking for stray nuts in the undergrowth, I found myself impulsively pressing my hands against the trunk and saying, 'thank you'.

If you don't have an almond tree, plant one.

While you're waiting for your first crop, you can easily find locally grown almonds in organic food shops. They are usually sold shelled but not blanched (ie peeled). However, it doesn't take long to blanch them yourself – and if you have any young children hanging around, their nimble little fingers will make light work of the job.

Once the almonds are blanched, you can make the most local snack of all in less time than it takes to walk to the supermarket.

Toasted Almonds

- 1 cup almonds, shelled
- a drizzle of olive oil
- a good pinch of salt

Boil the kettle. Place the almonds in a small bowl, cover with boiling water, and leave to sit for five minutes. Remove a few almonds at a time and pop them out of their skins, then leave on a tea towel to dry.

Heat the oil in a wide skillet. Throw in the almonds and toss and shake the pan to toast them evenly. They are done when they smell good.

Salt and serve, hot, tepid or cold.

The children in our house forbid the cooking of anything spicy, but if you like a little heat, add a crumbled dried chilli to your almonds with the salt.

(Backyard: almonds. Local: olive oil. Murray River: salt.)

Wednesday, June 2, 2010

Penne with Broccoli and Tomato


There's a Romanesco broccoli in my box. It has tight lime-green spirals and I know it will taste terrific in this pasta sauce.

The sauce has olives in it. I cured local olives, which make lovely nibbles, but they aren't strong enough for pasta. And the other local olives I have found so far have been soft and bland compared to the olives from overseas. "No like it," say the little ones. So I use international olives because, at this point of my life, the benefit of having my children love and eat this dish far outweighs the value of buying local.

Penne with Broccoli and Tomato

- 1 head of broccoli. Romanesco is especially delicious here, but regular broccoli is good, too.
- 5 fresh tomatoes, or a jar of home-preserved tomatoes, or a can of tomatoes
- 2 cloves garlic, bashed with the flat side of a knife then chopped
- a handful of black olives
- 5 or so stalks flat-leaf parsley, chopped
- olive oil
- half a packet of penne
- Parmesan or other hard cheese, grated

Put a large pot of water up to boil.

If you are using fresh tomatoes, plunge them into boiling water then peel, seed and chop them.

Gently heat a slosh of olive oil in a wide frying pan. Add the garlic and cook gently until just beginning to colour, then add the tomatoes (whether fresh or from a can). Leave to simmer gently.

Plunge the broccoli into the boiling water. Cook for 3 or 4 minutes, until it is just tender, then remove with a slotted spoon and add to the tomato mixture.

Bring the water back to the boil, salt well and add the pasta. Cook according to the packet directions.

While it is cooking, pit the olives by pressing gently on them with the base of a glass. Tear them in half and throw them into the tomato broccoli mixture. Break up the broccoli with the back of a spoon until it is crumbled through the tomato sauce. Add ¼ cup of the pasta cooking water to the sauce, and stir in the parsley.

Drain the pasta and add to the broccoli tomato sauce. Stir to combine, and check for seasoning.

Serve with plenty of grated cheese.

(Local: broccoli, fresh tomatoes, garlic, parsley, olive oil. Victorian: pasta from Victorian wheat. Definitely not local: olives, parmesan. Photo shows a regular broccoli, when I made the sauce another day.)

Tuesday, June 1, 2010

Tuna Steaks with Salsa Verde


In an extraordinary boon to our local eating, a friend of ours caught a 122 kilogram tuna last weekend! So we have been the grateful recipients of some spectacularly fresh fish.

Tuna has very dense flesh – it's more like meat than fish. It goes well with strong flavours and grills beautifully.

So, because I'm a cooking coward, we didn't make sashimi. Instead, I seared the tuna on a cast iron grill pan and served it with Salsa Verde. The interior of the tuna was ruby red, softening out to a lighter pink near the surface. The grill lines gave the exterior a lovely texture and taste, and the whole just melted in my mouth.

It was so good, even my kids ate it. Or was it the Salsa Verde that they liked? Possibly - they slathered Salsa Verde everywhere, even over the easy peasy potato wedges that I served on the side.


Tuna Steaks with Salsa Verde

- one or two tuna steaks, about an inch thick (ask the fishmonger about the provenance of the fish, or make a fishing friend. You can also download a sustainable seafood guide here.)
- large bunch of flat-leaf parsley
- some mint
- 2 or 3 cornichons
- 1 tbs capers
- 6 to 8 anchovies
- 1 tsp Dijon mustard
- 1 clove garlic
- the juice of a lemon (red wine vinegar is traditional, but it's lovely with lemon and lemons are local)
- olive oil
- extra lemon, to serve

Heat the griddle pan.

While it is heating, throw the ingredients for Salsa Verde into a food processor. Add a slosh of olive oil and whizz until combined – a little nubble is fine. Taste and adjust for sharpness, and season. (Of course, you can always chop the herbs, cornichons, capers, anchovies and garlic by hand, then stir in the mustard, lemon and olive oil.)

Rub the tuna with salt and oil, and place on the very hot grill. Leave for four minutes.

Flip the tuna carefully and cook on the other side for 2 minutes if you like it very rare (recommended), 3 minutes if you like just a thread of pinkness (still pretty good), and 4 minutes if you want it to taste like canned tuna (to which I say, what's the point?).

Serve immediately with the Salsa Verde and some extra lemon wedges on the side.

(Backyard: parsley, mint, lemon. Local: tuna, garlic. Non-local: cornichons, capers, anchovies, Dijon, salt.)

Potato Wedges


Potatoes, potatoes, potatoes. We live in potato country, and these days I'm eating more than my share of them, mostly in wedges. You see, most evenings at half past five I suddenly realise I should have started making dinner already. But it's too late to bake potatoes, and my kids HATE mash, so I slice them up and make wedges instead.

It's the easiest and most palatable way to cook potatoes that I know. They come out of the oven crisp on the outside, and clouds of fluff inside. Perfect! And as long as there's some Salsa Verde, pesto or some other herby sauce to dip them in, even my four year old will eat them.


Potato Wedges

potatoes
olive oil
salt

Pre-heat the oven to 200C.

Slice the potatoes lengthwise into thick spears. Toss the spears with olive oil in a bowl, and scatter over a baking tray.

Bake for 20 minutes. Remove from the oven, flip each spear, then bake for another 10 minutes by which time they should be beautifully golden and crisp on the outside, and mealy on the inside.

Toss with salt, and serve immediately.

(Local: potatoes, olive oil. Non-local: salt.)